Wednesday, 8 June 2016

Battle of Jutland 8 - The Aftermath.

King George V addresses sailors of the BGF from the deck of
the crippled battleship Warspite after the battle.
We have seen how the German return to home 24hours ahead of the British enabled them to steal a march with their version of events, which quite clearly trumpeted a striking German victory against the British Grand Fleet. This news reached the British government and population before the Admiralty's own official version of events and led to surprise, incomprehension and anger. From the beginning the knives were out for Jellicoe, setting the scene for later bitter disputes. In the short term however a gradual appreciation of the facts beyond the simple totals of ships and men lost brought a reappraisal. In mid June, an American newspaper summarised this with a neat analogy: "The German Fleet has assaulted its jailor, but it is still in jail."  

Jellicoe and the Admiralty fumed at the way the German interpretations warped the public perception of their actions. In June, Jellicoe wrote to his wife:

Of course I am not satisfied, as given clear weather the battle would have been final and there would have been no German Fleet left, whatever happened to us. But that can't be helped. It is ludicrous for the Germans to claim a victory. Victory always rests with the force that occupies the scene of the action, and we did this for the greater part of the next day, until it was quite clear that they had all gone home or as many as were left to go. If they had been so confident of victory they would have tried to go on fighting instead of legging it for home.

The German High Command knew it. In his confidential report on the Battle to the Kaiser in July 1916, Scheer admitted:

Should future operations take a favourable course, we should be able to inflict serious damage upon the enemy. Nevertheless, there can be no doubt that even the most successful outcome of a further battle will not force England to make peace.... A victorious end to the war within a reasonable time can only be achieved through the defeat of the British economic life - that is, by using the U-boats against British trade.... It is my duty to advise Your Majesty that in British waters, where American interests are strong, it will be impossible to avoid incidents, however conscientious our commanding officers may be.... "

The passage of time, through the rest of the war and the early post-war years consolidated the view that Scheer, in a fog of uncertainty had ridden his luck and made decisions that allowed his fleet to escape, rather than being the tactical genius portrayed in the German and wider press.  His U-boat and aerial reconnaissance plans had made zero contribution to the battle, and in good visibility his fleet might have been annihilated by the BGF.
The summary naval verdict was best summarised sixty years later by Marder:
 (From the Dreadnought to Scapa Flow [1978]) with his judgement that:

"since neither fleet was able to inflict a crippling blow on the other, the battle belongs to the series of inconclusive battles or partial victories which are the rule in naval warfare."

Admiral David Beatty - unaccountably
promoted C-in-C after his performance
at Jutland
In Britain however, matters became inflamed post-war with arguments for and against the reputations of Beatty and Jellicoe. Notwithstanding his error strewn performance at Jutland, Beatty was promoted to Commander in Chief of the BGF in late 1916, as Jellicoe stood down on health grounds. In this role Beatty received the surrender of the German Fleet at the war end in 1918, and rapidly became a national hero. After the war a report of the battle was prepared by the Admiralty under First Sea Lord Wemyss, by Sir Julian Corbett and Vice Admiral John Harper. Before the report was published, Beatty was himself appointed First Sea Lord, and immediately requested amendments to the report. (Now) Viscount Jellicoe, posted overseas as Governor General of New Zealand, was forced to defend his position from the other side of the world. When the authors refused to comply with Beatty’s demands, he ordered the report to be destroyed and instead had  an alternative report prepared, which proved highly critical of Jellicoe. Considerable argument broke out as a result, with significant numbers of servicemen disputing the published version, including Admiral Reginald Bacon – a brilliant, if opinionated officer -  who wrote his own book about the battle, criticising both the version sponsored by Beatty and Beatty's own part in the battle. It contains this withering view of Beatty:
Admiral Beatty…failed when an experienced admiral would have succeeded, and his battle cruisers paid dearly for the omission, and the nation missed what should have been an annihilating victory”
However, Beatty remained the dashing Nelsonian hero of the popular press (and hence the man in the street) for many years. Have we got the perspective right now? It seems to me that Beatty was a reckless and vainglorious commander, intolerant of others and quick to apportion blame. Jellicoe’s more measured approach ensured continuing British control of the oceans, making a major contribution to eventual victory – am I wrong? 

Never again would such battle fleets assemble on the high seas. The arrival of air power, better submarines, missiles and above all better communications meant that an event such as Jutland could never be repeated.

Regarding the remainder of WW1, the Jutland outcome had a major impact on German conduct of the war. The British distant blockade of trade bound for Germany continued, and increasing levels of famine began to affect front line soldiers as well as the home population. The dreadful ‘turnip winter’ of 1917-18 brought the civilian population to its knees.

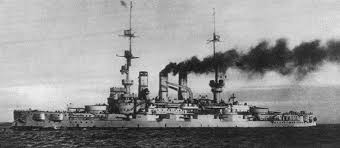
SMS Seydlitz - crippled at Jutland.
Such damage influenced the Germans against
trying a repeat operation.
Scheer’s report was backed by the military, but resisted by the politicians led by Bethmann-Hollweg, the chancellor, until early 1917, when unrestricted U boat warfare was finally resumed, rapidly bringing the USA into the war.
Finally, the morale of the men of the GHSF was destroyed by the outcome of Jutland – cooped up in home ports and the Baltic Sea with no prospect of real action. In late 1918 those men mutinied against orders for a final suicide sortie into the North Sea.


Here was the real outcome of the Battle of Jutland, and Jellicoe’s prudent tactics.

Saturday, 4 June 2016

Battle of Jutland 7 - end of the battle

The Jade Estuary, south of Wilhelmshaven.
The GHSF equivalent of Scapa Flow
 Within two hours of sunrise Scheer’s fleet had passed Horn Reef and were in the mined passage back to port. They reached home - the natural harbour of the Jade Estuary at Wilhelmshaven - in early afternoon June 1st and celebrated victory with champagne.

Jellicoe's fleet was more dispersed and had much the longer journeys back to Rosyth and Scapa Flow. Only in this sweeping phase of rounding up straggling smaller ships did Jellicoe, to his shock (and no doubt anger), receive a signal from Beatty informing him of the explosions and sinking of Indefatigible, Queen Mary and Invincible (he was aware of the last of these). On their path home the two damaged British Dreadnoughts Marlborough and Warspite were both attacked by torpedoes, but got home safely. Three of Arbuthnot’s armoured cruisers were lost, Warrior on the journey home. On Friday June 2nd at midday, Beatty reached Rosyth and shortly afterwards Jellicoe entered Scapa Flow.


The Battle of Jutland was over, and essentially its climax had been the brief reality of engagement between the vanguards of the two greatest fleets ever assembled. The battle that had been anticipated, plotted and prepared for several years was happening right there, and yet within minutes Scheer had managed to elude his much more powerful opponent. The following confused and frenetic activity through the evening and night of 31st May may have been a strategic anti-climax, but not to those who lived through (or died in) the horrors of the close combat that occurred. On both sides seamanship had generally been of a very high order, whereas for both, communication in all it's forms had been dreadful.

So, was Scheer right in celebrating victory with champagne - a victory that the Kaiser trumpeted world wide the following day? The world wide response to the Kaiser's claims before the Admiralty had released its own statement shocked the British public, confidently expecting a Trafalgar style outcome. It was only with the passage of days and weeks that it became apparent the Britain's control of the North Sea and the oceans had not been influenced by the battle, and the Germans had themselves suffered considerable damage without making a significant advance.

The final tally of losses was:
In men (approx): Britain 6,000 and Germany 2,500. Unlike land warfare the injured totals were only 10-20% of deaths; 700 and 500 respectively.
In ships: Britain 14 - Battle cruisers Indefatigible and Queen Mary and destroyers Nester, Nomad and Shark in Beatty's action v Hipper 14.30-18.00; Battle cruiser Invincible and armoured cruisers Defence and Warrior in the Battle Fleet action 18.15-18.45; and armoured cruiser Black Prince and destroyers Tipperary, Sparrowhawk, Fortune, Ardent and Turbulent  in the night actions and return to port.
              Germany 11 - 2 destroyers in Beatty v Hipper; Battlecruiser Lutzow and light cruiser Wiesbaden in the Battle Fleet action; and pre-Dreadnought Pommern,  3 light cruisers and 3 destroyers in the night actions and return to home ports.
So, in terms of ships and men lost, unquestionably a German victory - althouhh had Beatty not lost 3 battle cruisers to the same technical flaw, the ships lost columns would have been comparable. There were other, probably more important, parameters to consider.
Beatty's Flagship HMS Lion.
Badly damaged at Dogger Bank in 1915
and again at Jutland in 1916
Firstly the damage sustained. Beatty's battle cruisers had suffered badly but of Jellicoe's 28 Dreadnoughts only two - Warspite and Malaya, both in Evan Thomas' QE Squadron sustained serious damage. Of Jellicoe's fleet Marlborough and Colossus were damaged, but none was hit significantly during the main battleship confrontation. German damage was much more severe. Only Moltke of Hipper's five battle cruisers escaped without being crippled, and three of Scheer's 15 Dreadnought battleships were badly damaged.
Secondly, and most tellingly in terms of the war not the battle, was ability to continue. Scheer knew he had escaped with his life and that of his fleet, and that he would not be able to attempt a similar move for several weeks, whereas Jellicoe's Grand Fleet was unharmed and ready to make steam within 24 hours of arriving back at Scapa Flow.


Nevertheless, less than 6 weeks after Jutland Scheer did make another, more modest, sortie. This time it was a plan to bombard Sunderland in the hope of luring the BGF out into a U-boat trap. Via intelligence, the British were aware of this, and sent out some of their own submarine defences plus an intercepting force of Tyrwhitt’s battle cruisers from Harwich. Although there were cruiser losses from torpedo attacks on both sides, misjudgements (again) by both Admirals meant that the battle fleets did not encounter each other, and by the end of the afternoon both forces were steaming back to their bases.

Admiral Reginald Tyrwhitt.
On standby for Jutland, he was
a fine sailor who excelled in 1914,
1915 and 1918. 

The early lessons from the battle were there to be seen and acted on:
1. The weakness of armour and design made the British battle cruisers more vulnerable to long distance plunging shellfire.
2. The British turret ammunition hoists were vulnerable to flash explosion down to the magazine with direct hits on the gun turret. Safety features for this known risk had been removed to improved the rapidity of re-loading. (The Germans had learned their lesson after a similar event with Seydlitz at the Dogger Bank action a year earlier, and were better protected.)
3. Shells. British heavy armour penetrating shells were inferior to the Germans’ weight for weight. However, the much greater protection afforded to the newer British battleships would have protected them if the main fleets had engaged fully.

However, the major controversy of Jutland related to tactics, degenerating post-war into a campaign of support for Beatty's 'bravery" and excessive criticism of Jellicoe's conservative approach. Jellicoe's detailed control over his entire fleet, combined with his risk averse approach led to long and continued criticism after the event. His main concern had been the torpedo threat of destroyers and U-boats, and he had given the Admiralty ample warning that his priority would be to protect his Dreadnoughts from torpedo ambush (fully endorsed by the Admiralty). Nevertheless, Churchill cites three clear opportunities to engage Scheer “without increasing risk” of torpedo attack, and other establishment and senior figures rounded on Jellicoe for depriving them of their 'second trafalgar'. There followed a clamour to allow greater initiative to be allowed to flotilla commanders.

More on the aftermath in the next post


Thursday, 2 June 2016

Battle of Jutland 6 - The night: fight and flight

HMS Iron Duke. Jellicoe endured hours of 
uncertainty aboard his flagship as a result
of abysmal communications.


Once action had been broken off, both fleets were heading due south out of sight of each other as the night approached. The final action of daylight matched the first. Beatty, somewhat to the south west of Jellicoe, encountered Hipper’s battered fleet and immediately engaged them, inflicting further damage before Mauve’s 6 pre-Dreadnought battleships made their only intervention of the battle, drawing enough of Beatty’s attention and firepower to allow Hipper’s ships to escape into the gloom. Jellicoe rapidly decided that he would not pursue further action in the darkness. Rather he would keep between Scheer and safety in order to roll him up in the likely renewal of action in the morning. He knew the Germans were far better equipped, in men, machinery and tactics, to fight actions at night.


Final Stages. The maelstrom at the top of the
represents the actions to after midnight, when
Scheer's desperate gamble paid off, taking him
from the west of the BGF to its NE, and close 

to the safety of Horn Reef.
21.00  As darkness fell on 31/5, Jellicoe had good reason to be pleased with his situation. His own battle fleet was undamaged, and he had 143 warships placed between Scheer’s GHSF of 93 ships and their options for escape. Amazingly he was not yet aware of the loss of Indefatigible and Queen Mary from Beatty’s force, although he had observed directly the fate of Hood’s Invincible. He was confident that the morning would bring the opportunity to re-engage with Scheer. He calculated that a southerly course would keep him between Scheer’s escape routes to Wilhelmshaven or the river Ems further south. He knew that Scheer’s fleet was better equipped and trained for night manoeuvres, but he thought it unlikely the German, having twice turned 180 degrees to avoid the BGF would try to break across his line and head east to the alternative escape of Horns Reef. His reasoning was logical, but in fact it was precisely what Scheer intended to do. Scheer felt he had very little time (daylight in June breaks before 3am in northern waters) and virtually no chance of outrunning Jellicoe to reach his southern escapes. He concluded that his superior night capabilities and his destroyers gave him a fighting chance of getting his Dreadnoughts home. If he was very lucky, he might even pass behind Jellicoe’s rearguard and avoid contact altogether (and as it turned out he was lucky, with Jellicoe being further south than him). At 21.10 he ordered his fleet to steer SE towards Horns Reef (an order intercepted by Room 40, see below). Of Hipper's five battle cruisers, only Moltke could still operate effectively: Derfflinger had one functioning gun turret, and the other three were unable to fire. Scheer placed Hipper’s invalids and six of his own damaged Dreadnoughts in the rear; his best and least damaged battleships in the van of his line, and then pushed his cruiser and destroyer screens ahead.
As the Jellicoe (heading S) and Scheer (heading SE) battle fleets converged unknowingly in the dark, they formed a V shape, which by chance became an X, almost like a formation dancing move, and they missed each other. However, the smaller ships did not, and some fierce close range fighting ensued between opposing light cruisers. The Southampton was badly damaged, and the German cruiser Frauenlob was blown in half by an almost point blank range torpedo salvo. Jellicoe was aware of this action, but not of its importance. The incompetence of the Admiralty in London in transmitting (or not) both true and false information left Jellicoe unwilling to rely on any intelligence received, and dependent on direct reports from his own ships (patchy at best). Thus the Admiralty decided to pass on Room 40’s interception of Scheer’s 9.10 order to turn SE, but - crucially - did not pass on Scheer’s request for aerial surveillance reports on weather at Horns Reef. Jellicoe did not believe the first, but might have done in conjunction with the second. He was understandably bitter about this after the war, when all was revealed and it transpired that seven other relevant signals were intercepted by Room 40 that night and not passed on. Massie, in his history "Castles of Steel" is withering in his condemnation of Admiralty incompetence "Personal responsibility for this gross Admiralty failure..was never officially assigned. ..... Admiral Oliver, the Chief of Staff, charged with approving Admiralty messages sent to the Commander-in-Chief "had left the room for some much needed rest and had left in charge an officer who had no experience of German operational signals". The said officer simply filed the messages without action - you couldn't make it up.

SMS Pommern. One of the Pre-Dreadnoughts
mistakenly taken to Jutland by Scheer. They slowed the 
fleet and were in action only once. Pommern 
was sunk by torpedoes
24.00 Scheer’s fleet found itself in action with the rear-covering British destroyer flotilla just before midnight. Although these disrupted the German Dreadnoughts course for Horns Reef with their torpedo attacks, they were no match for the searchlights and night fire of the Germans. Of the 12 in the flotilla, 4 were sunk and 3 badly damaged. 
The final acts of the night were devastating explosions that destroyed two medium sized ships. The first was the British armoured cruiser Black Prince. Originally part of Arbuthnot's 1st Cruiser Squadron (see previous post) she had been detached and lost since that group had been broken up about 6 hours earlier. Heading south, looking for the BGF, she blundered into Scheer's Dreadnoughts just before midnight. She was massacred in a hail of floodlight and shells - sinking with all 900 crew lost. 
Less than two hours later, as Scheer's (by now) motley fleet completed their high risk transit across the stern of the British Fleet, and were less than thirty miles from Horn Reef, they ran into a final flotilla of destroyers guarding the NE aspect of the BGF. The destroyers, led by Stirling, captain of the Faulkner launched a torpedo attack. His tubes missed the leading Konig Dreadnoughts, but sunk the pre-Dreadnought Pommern (pictured above), which went down rapidly with the loss of 800 lives. On this occasion, Stirling had the presence of mind to signal Jellicoe directly regarding the whereabouts of the GHSF, but agonisingly his messages did not get through. Scheer had lost a few small ships, but it was a price worth paying for the now (almost) secured safety of his Dreadnoughts.

02.00 But why did no-one else signal to Jellicoe to alert him to the importance of the action astern his main fleet? A combination of mixed messages from the incompetents at the Admiralty, and silence from his own Fleet commanders left him completely to his own devices and, frankly, to guesswork. Admittedly, officers were reluctant to signal too frequently for the risk of giving away positions, but for this cause that reason should surely have been disregarded.  Jellicoe was content to steam south, believing he was cutting off Scheer’s escape while putting distance between himself and what he took to be German destroyers in his rear – it was after all the torpedo threat that concerned him the most. He would face unrelenting criticism for this after the war, and yet he had at least two senior commanders much closer to the action than he, who chose not to react. As first light broke around 02.00 on 1st June, Scheer was completing his fleet’s passage across Jellicoe’s stern, and was almost in sight of Horn Reef.
Not all their damaged ships got there. German destroyers torpedoed the stricken Lutzow after her crew had been taken off. Wiesbaden sank in the North Sea. Seydlitz, struggling badly, narrowly avoided the rear of the British fleet, but ran aground on the sands of Horn Reef. Moltke, with Hipper on board, was the only one of his squadron to avoid severe damage, but was detached from the GHSF. She was the last to make her escape, eluding the BGF by a southerly route.

04.00  At dawn, Jellicoe’s fleet had been widely dispersed. He expected that he was still to the SE of Scheer, and ordered a turn to the NW, both to get closer to his stragglers and to search for Scheer. Beatty was further to the south searching for Scheer. At 04.00 Jellicoe received belated but unequivocal news from the Admiralty that Scheer was almost at Horn Reef. Ironically, this was just as Beatty was seeking permission (brashly, in view of his previous errors and misjudgements) from Jellicoe to join him to the SW, the opposite direction, in looking for Hipper.
Jellicoe immediately realised the implication of the Admiralty message. The Battle of Jutland was over. there was nothing to do but sweep up and go home. At 04.15 Jellicoe set his fleet to cruising order, to sweep back northwards to base.